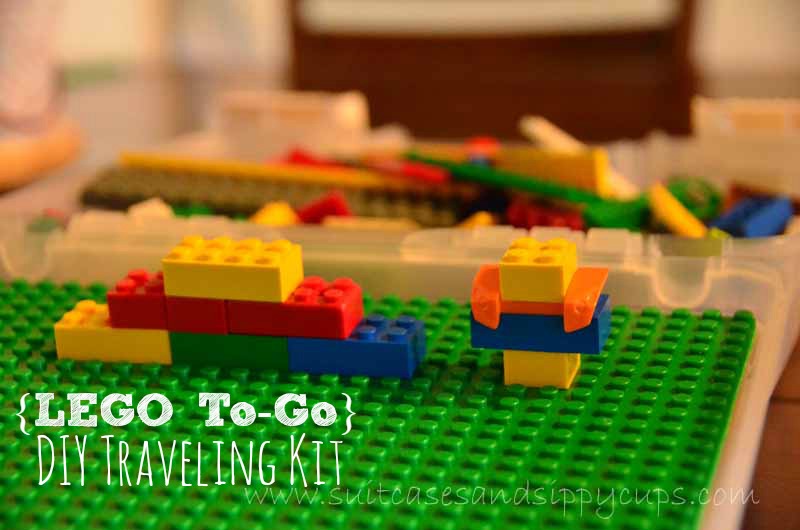
There are very few things, other than…ahem…video games, that can keep my children entertained for hours. The one special toy that has that magic touch is Legos. The open ended, focused play and creativity that these colorful little blocks afford makes them ideal for just the kind of quiet play we want to encourage during long car rides and plane trips. Unfortunately, tiny little plastic blocks don’t travel well. With a lengthy road trip coming up, I wanted to see if I could take our favorite toy and make a bit more portable.
How to Create a Traveling Lego Kit Step by Step
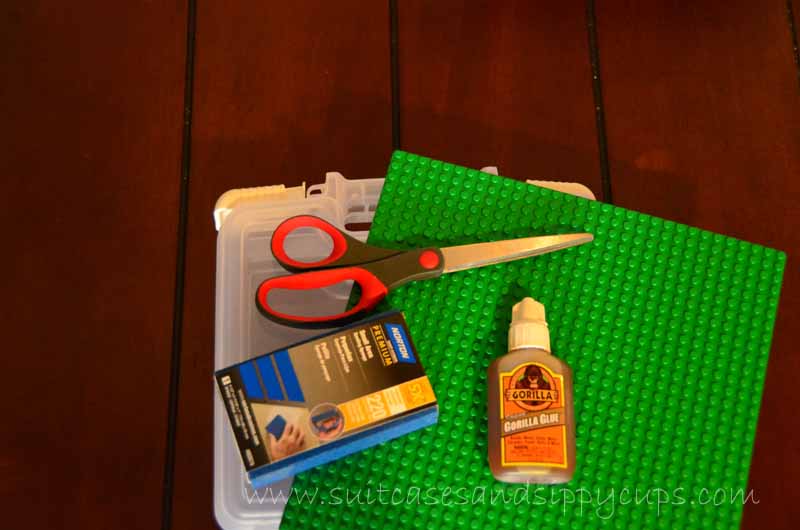
Supplies: Some sort of square box (I chose a plastic locking box from the scrapbook section of the craft store),arge Lego building plate, scissors, sanding block, glue, Legos.
Optional Supplies for Decoration: Foam letter stickers, Self-adhesive craft foam sheets, Sharpee.
This is one of those DIY projects that is really so easy that it doesn’t need much explanation. Once you have gathered supplies, you can be done in about 5 minutes, not counting the 50 million interruptions you might get in the process.
Step One: Cut the building plate to fit the lid of the box. Since my lid was not perfectly square and I only had one building plate, I made a paper template to be sure it fit before I cut. Using my paper template, I measured the section of the building plate and cut with a simple pair of kitchen scissors.
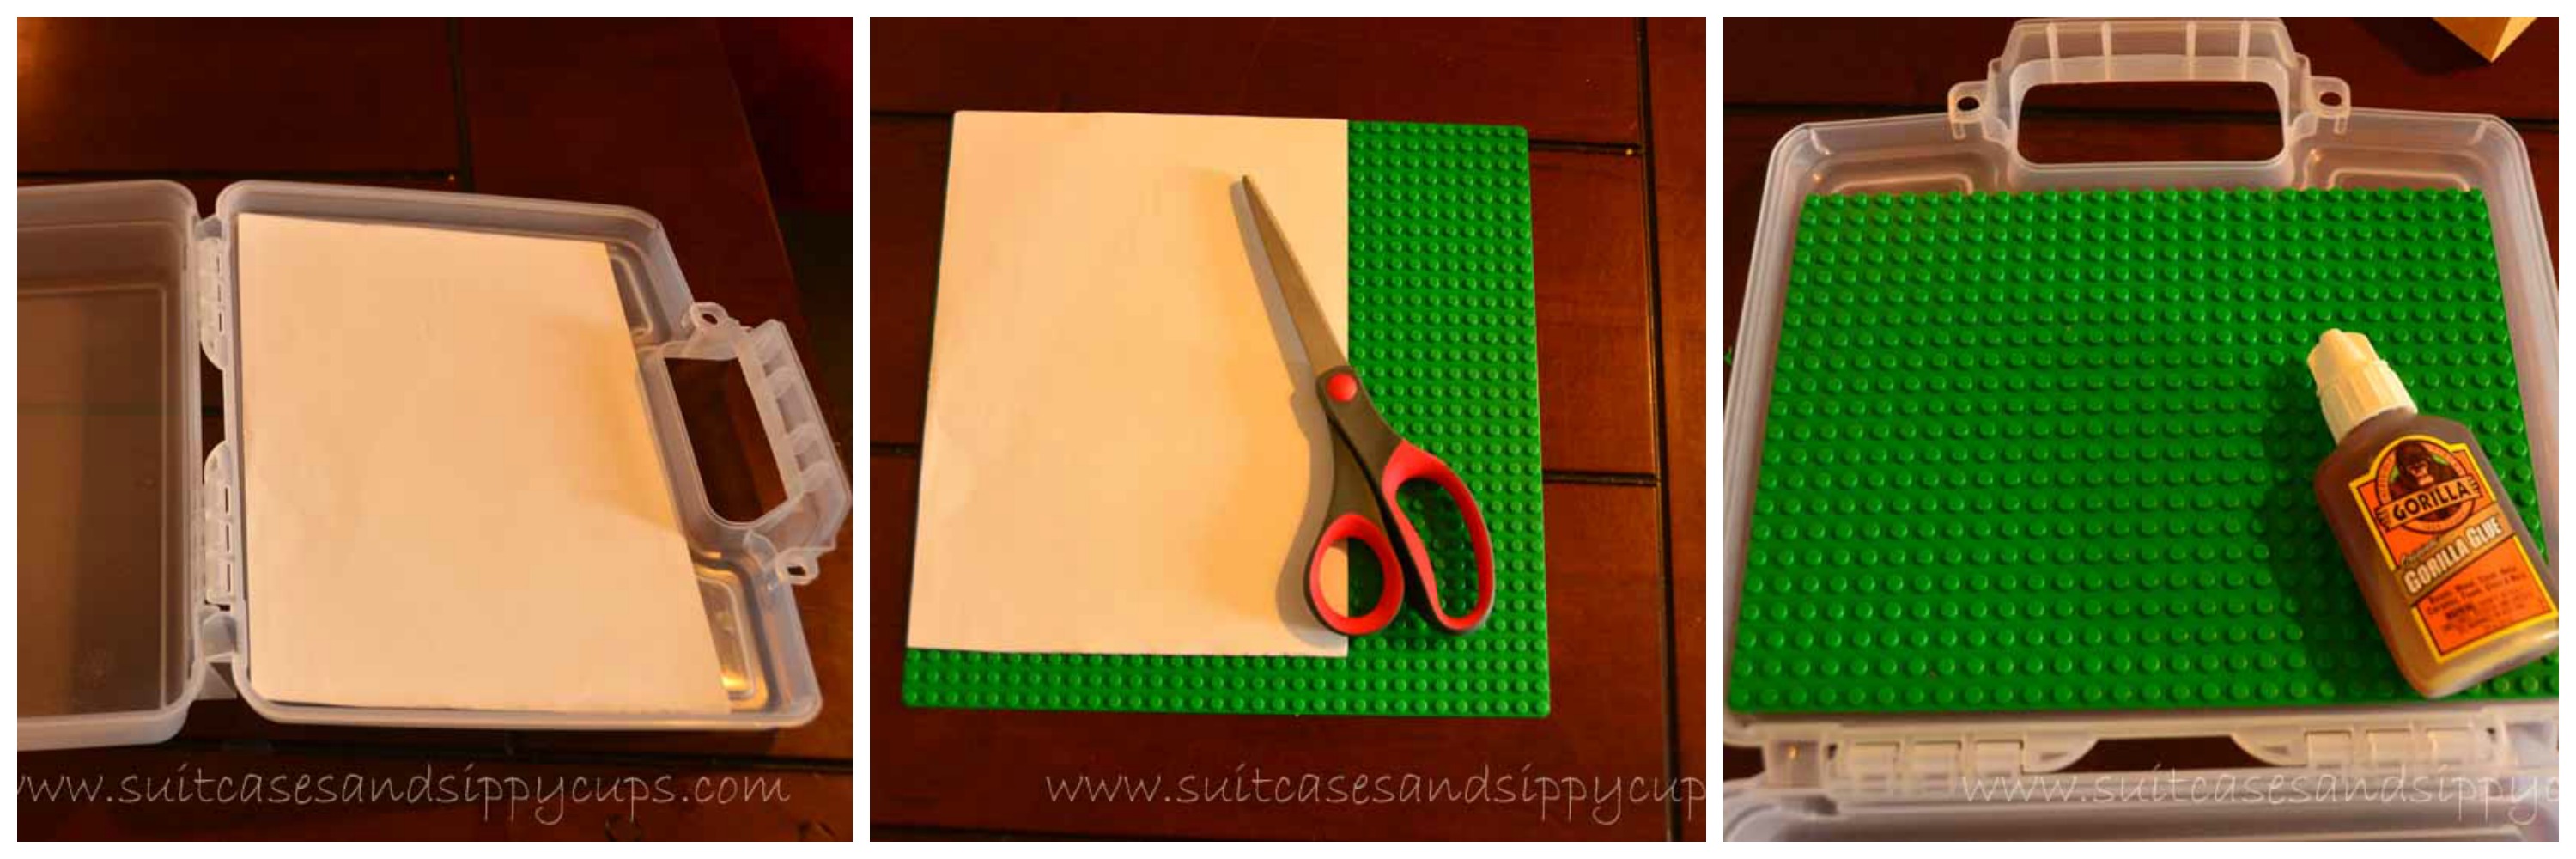
Step Two: Sand the edges to remove any rough pieces of plastic that occurred while cutting.
Step Three: Adhere the building plate to the lid of the container. I initially intended to use Gorilla Glue, but because my box is clear, I used super glue instead.
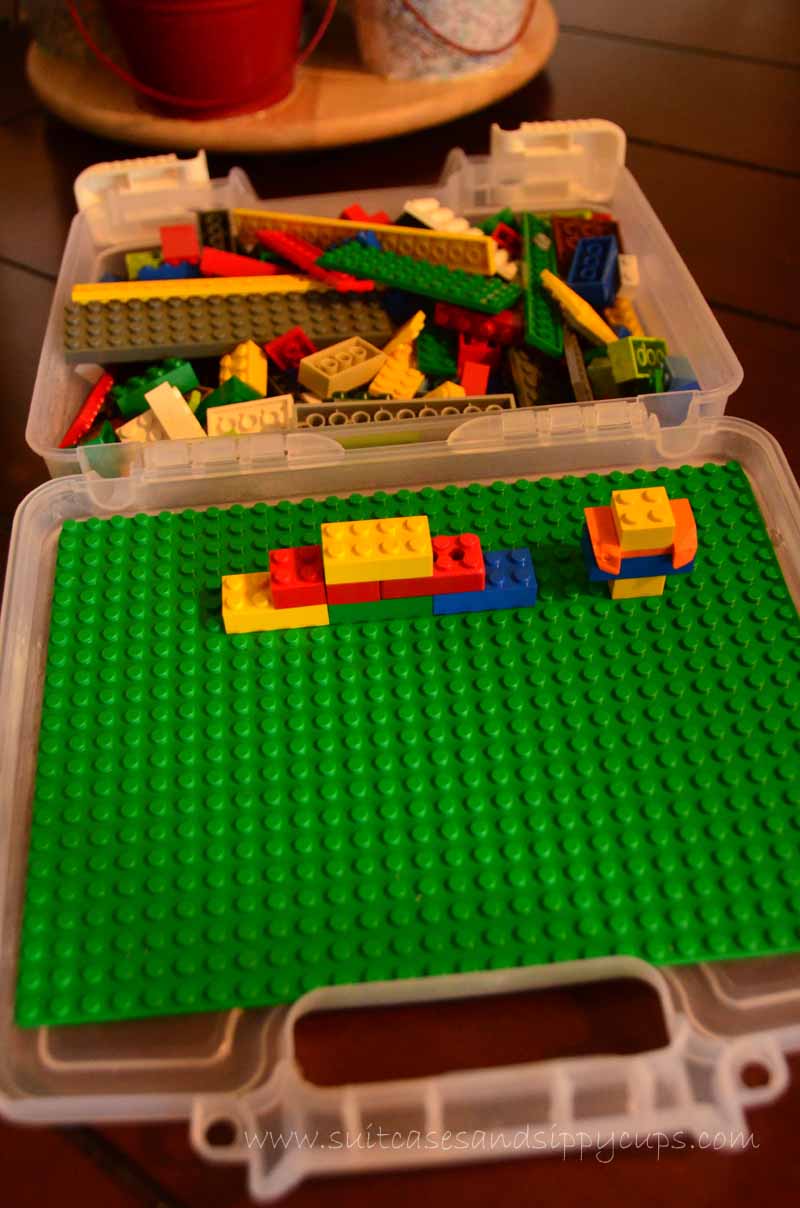
Step Four: Add Legos and play on the go.
Steps for Decorating the Outside of the Box
I wanted add a little “cute” to my traveling Lego box to make it more fun, but these steps are certainly not necessary to make this kit usable.
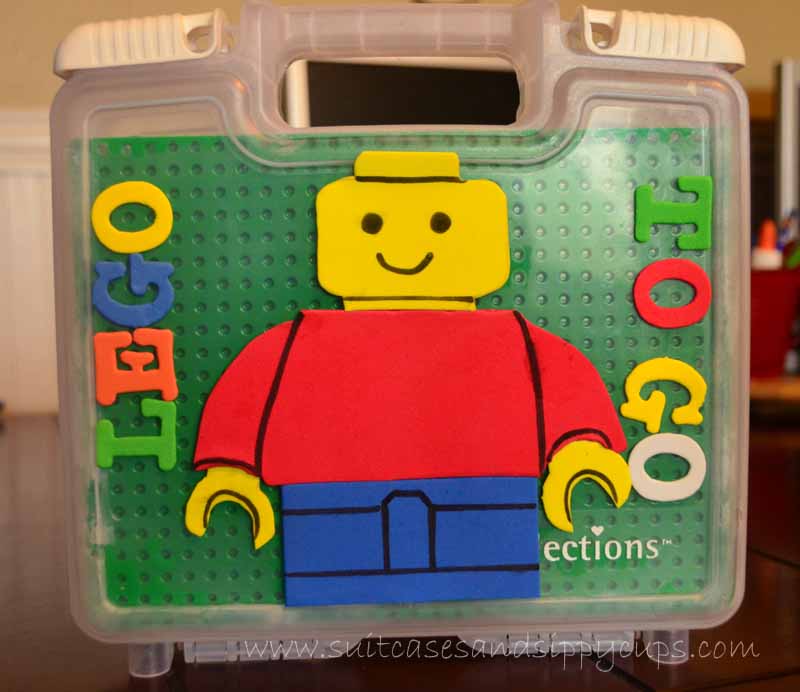
Step One: I wanted to add a Lego Mini-Fig guy to the front of my kit, so I printed an outline of Mr. Mini-Fig to the right size for my kit.
Step Two: Cut the pattern into pieces to use as templates for the Lego Guy.
Step Three: Trace each piece of the template onto the appropriate color of self-adhesive foam. Cut out each piece.
Step Four: Use a Sharpee marker to add facial features and details to each piece.
Step Five: Adhere the pieces onto the front of the box.
Step Six: Add foam letters to label the box.
~Welcome to Travel Tips Tuesday!
- READ THIS FIRST: The purpose of Travel Tips Tuesday is to build a community that encourages sharing and support among travel bloggers and writers. As your hosts, we don’t want to create a list of rules for participation, but we ask that you use the “Golden Rule” whenever you link up to the carnival. We would be thrilled if you would add a link to one of your hosts in your post, or give us a shoutout on social media, and we will do our best to reciprocate. In the spirit of community, it would be ideal if you visit some of the other blogs and keep the travel tip love circulating.
- Posts on both Suitcases and Sippy Cups and Walking on Travels will go live at 11pm EST on Monday night. You only need to link to one of these sites to have your link show up on both.
- Spread the word via Twitter using the hashtag#TravTipsTues
- Please note: any and all spam links will be deleted immediately to uphold the integrity of this blog carnival. This is not the place to post advertising or sponsored links. Please contact the hosts directly with these types of inquiries.
Brilliant! I love this idea, and I’m going to employ it (but probably with the bigger toddler-friendly Legos since my tot is only 2). Also, any tips for not losing the Legos during travel?
Jennifer (aka Hint Mama) recently posted…Today’s Hint: Easy Plane Goodies for Fellow Passengers
Hi Jennifer,
When my son was a toddler I just allowed the car Duplo to be used on the plane (less pieces to loose) and then when we were in our hotel room told him to just play on the coffee table and at the end of the game I would check that all the pieces were still there.
Sally@Toddlers on Tour recently posted…5 Easy Picnic Meal Ideas for Families
What a great idea. I hadn’t thought of cutting the board down to fit the box..
Last year I found a creator set (I love creator as there are several things to make out of the same pieces). It came in a small plastic case and has moveable compartment dividers to separate the Lego. This set is now our travel set and is kept just for travel, we are going away in a couple of weeks and I have bought another creator set to add to the case – my son is REALLY excited about building it when we get to Penang.
Sally@Toddlers on Tour recently posted…5 Easy Picnic Meal Ideas for Families
I love this. Pinning it now! Open-ended toys are definitely great for long trips.
Bronwyn Joy recently posted…My First (And Possibly Last) Blog Giveaway
Really cute idea! On our latest flight I had a small container of Legos and it ended up being a great way for my boys to play (sans electronics) while waiting to board!
Amanda @ MarocMama recently posted…Adventure Sports in Essaouira